Tuesday, November 29, 2016

Amp draw on lights.......

14 lights in total (5 Alpenglow traditional +  9 LED).  Total draw  6 amps. (12v).

9 LED only, total draw 2.2 amps (12v).

The traditional Alpenglow still draw approx .8 amp each but I like the mellow light.  As they fail I will convert the fitting over to LED.


Wednesday, November 23, 2016

Blowboater priced video monitor......

The Whitby/Brewer has a large engine room, very large by sailboat standards.  I, like all prudent sailors, carry out an engine room inspection every two hours, while motoring.    Well..., kind of, sorta, when I not seasick, tired etc..  I always check when I smell something burning.

I have always planned to install some sort of video camera and knew that they had to be a cheaper option than the Marine branded ones for $400+.  What about truck reversing cameras?  Bingo. 

Esky EC170-08 Waterproof Night Vision HD

If you have a MFD with a video input, you are good to go;

  
I already have White/Red lights in the engine room and will install a remote switch near the plotter.

Friday, November 11, 2016

Crap by design - die-cast zinc, monkey metal, white metal.........

The biggest sinner in this area, in the marine industry is the ubiquitous Perko.  Even if they coat their zinc products in Chrome, IMHO they are still crap.  On some of their zinc plated products you used to see "for freshwater use only", I haven't seen that for a while.  You will recognize these products by their acne like appearance.   Here are the examples on your standard Whitby/Brewer interior doors.


And these horrendous devices aren't cheap.  The one above has a retail price of $107, even though you can get it online from $65.

I spend a lot of time looking for a replacement and finally found one.  Its also not cheap, the brass version is $120.

Whitechapel Ltd

They fit on my W42 with very minor alterations to the screw holes.  I am happy to support quality products.

 They come with a set of shims.


Tuesday, September 20, 2016

Workshop area completed.


Large door handles are designed to keep doors level to act as work surfaces.

Friday, September 16, 2016

Securing Lockers.......I believe in BBBs'

Big Bloody Bolts.  This is a quote from the Fastnet Race Disaster of 1979.

"‘Lethal missiles;  Of the 303 yachts that started the ’79 Fastnet, 112 reported knockdowns, 77 of which were B2 knockdowns, ones in which the mast is substantially below horizontal, the yacht inverts or undergoes a full 360-degree roll. The inquiry into the disaster reported: ‘In several boats, cookers and batteries fell out of their mountings. Both items are potentially lethal missiles.’ On his Fastnet ’79 experience, Matt added: ‘Dangers below are frequently ignored. One of the biggest problems aboard Grimalkin during the height of the storm was how objects broke loose. Each time the yacht suffered a knockdown, tins of food and other heavy objects were flying around the saloon. When Grimalkin was recovered, one of the lead acid batteries, which had been secured under the companionway steps, was found wedged in the yacht’s bow. This deadly missile had taken away part of the main bulkhead during one of our pitchpoles.’"

Lockers on TIH have bolts to keep them closed.  "Finger Pulls" do not cut it;


A much younger me during the Fastnet 79, recovery operations with a fellow diver.


Tuesday, September 13, 2016

Alpenglow light conversion to LED

See previous "Lighting" post for details.


Monday, August 29, 2016

Small carpentry projects

While the settee was being constructed by Greg the carpenter I had him do some other small projects.

 Panel in walk-through.  Most W42 have an electrical panel here.  I do not, just storage.


 Lynne is not to enamored with  anything that blocks off the saloon space but I like proper storage.

The back on the plate rack will hold an iPad that can bee seen from the bunk and show data should as AIS targets or wind speed.

 I like proper storage. I may have mentioned that.

Second and final Saloon Settee

 Individually hinged lids.  On most W42 there are drawers on the vertical face.  I hate drawers.

 Front face lifts and will be pinned to give a "lee board" for overnight passages.

Front face lifts lifts up and folds down to give a 36" bunk for guests.  Back cushion will be sized to fill up the space.
Slots to allow the positioning of the boards.

Saturday, July 23, 2016

"We do it right, because we do it twice."

I'm back.  I spent the last two months in Portugal and Spain walking the Camino Portuguese from Lisbon (360 miles).  I'm now back in a sweltering Miami, wondering why.

This is just a placeholder for work on the saloon setee/bunk.  The great thing about a looooonnng boat refit is that you get to redo your original work.  My motto for the Marine business is "We do it right because we do it twice."


Saturday, April 30, 2016

Anchor rant.............................................

Anchors..... let the bun fight begin. Is there anyone out there with a CQR anchor still hanging off their bow roller? If so its time to put it in the same box as your plastic sextant, Radio Direction Finder and your Kapok lifejacket. If your boat drags and hits me, we can work things out, $hit happens. If, however, you were using a CQR or some other antique POS the conversation will be different.  I can even live with the Delta and Bruce, even though they are somewhat outdated.  There is a whole slew of new generation anchors out there that are so far ahead of their predecessors that it is ridiculous.  My favorites are the Rocna and Manson, and I have no objection to the other variants of the design.  My recent experience with the Spade anchor was outstanding.  It set fast and held solid, sort of what you need in an anchor. 


The owner had initially bought the aluminum version (shown above) in order to save weight (26lbs and opposed to 44lbs).  I bitched and moaned until he swapped it out for the galvanized steel version. I can see no reason to have the aluminum version unless its for some piece of Tupperware that never leaves the bay.  Also, their sizing chart tends towards light production boats, so I would move up a size or two.

My backup anchor is, as always, the biggest Fortress I can stow onboard.


Thursday, April 28, 2016

Cap-Rail final-final-final decision....

And the winner is......................... IPE

Family Name for Ipe Lumber: Tabebuia of family Bignoniaceae


The old sealant (origin unknown) was pretty shot.  Some 5200 had been squirted in at some stage to little avail.

 
This made getting the old rail off pretty easy, once the screws were removed.


This was a useful tool to remove the bolts holding the genoa track, if they are the old slotted type.


I had a local wood-shop use the old cap-rail as a template and make me a new one, including screw holes. 


 Ipe is hard to bend, but it will bend slightly.
 

After much research I will use Teakdecking Systems FE-180A to bond the Ipe to the fiberglass.

Full install won't take place until I return from Europe in late July

Friday, March 11, 2016

Alpenglow LED conversion...shamless theft of a good idea...

Thanks to John for the inspiration (I couldn't find a comment button on your blog to ask permission, so I will just beg forgiveness);

http://svmysticeti.com/?p=119

I had planned to do this for some time but it was on the nice to do list.  Then one of the ballasts began to give out.  I have a spare ballast but the installation was above my pay grade.

John's article is excellent so I won't repeat it here.  Suffice to say that I took the "non-soldering" route with components from 1000bulbs.com.  My solution was more expensive but any failed components can simply be popped out and replaced.  Unit cost of the LED upgrade is approx $30.  Labor, as usual, is about $0.01 per hour.  Power usage should be approx .3 amps on white and .25amps on red.

I really like the Alpenglow company and I have no doubt that their upgrade would be better quality, but hey, I'm a sailor.  I would certainly recommend their new LED fittings as an initial installation.

Original Alpenglow


Alpenglow converted to LED (3000k Warm white and red);

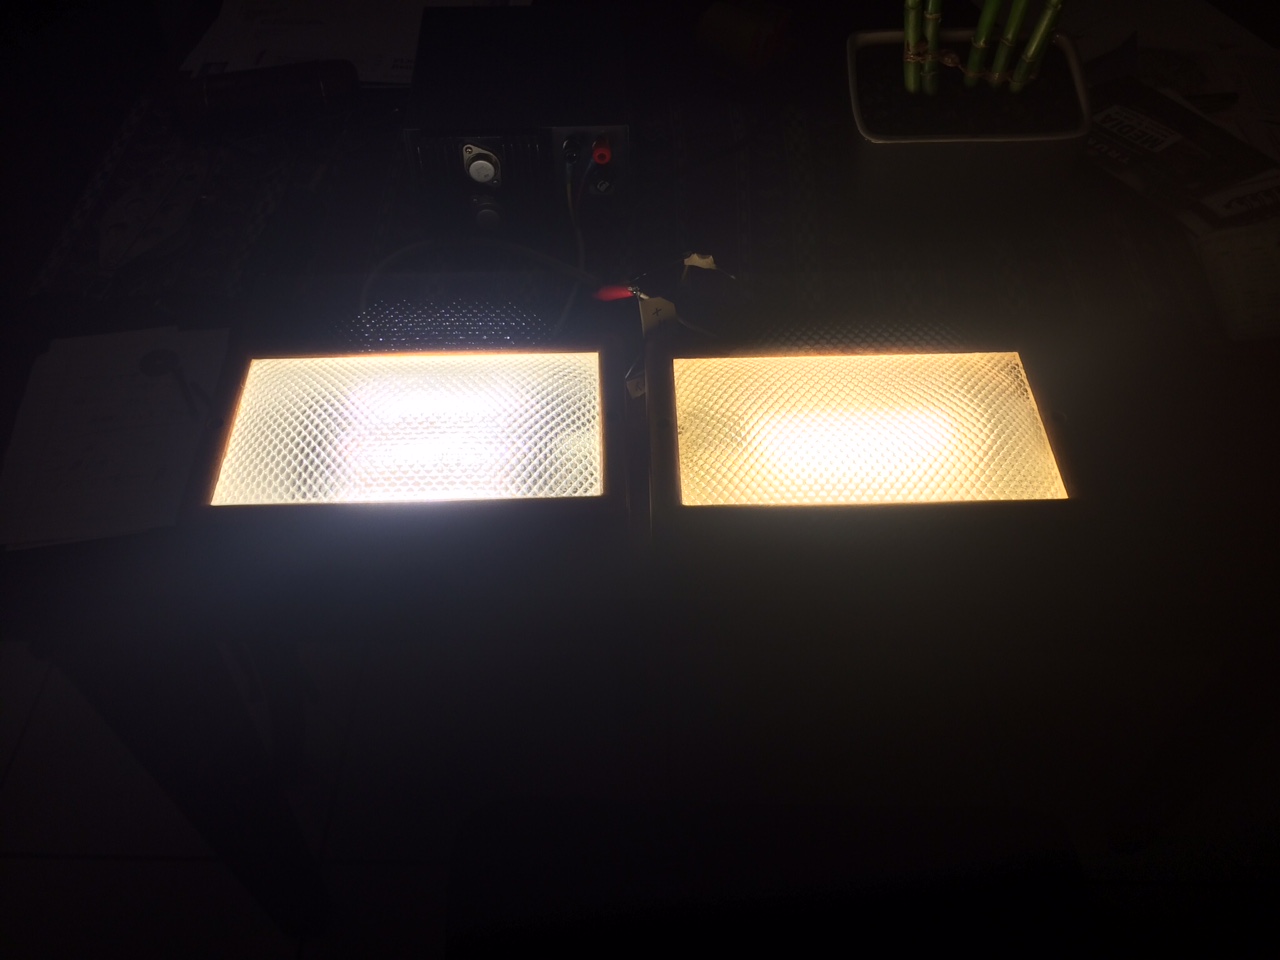
LED on left (only one power setting), original on right, low power.


LED on left (only one power setting), original on right, high power;
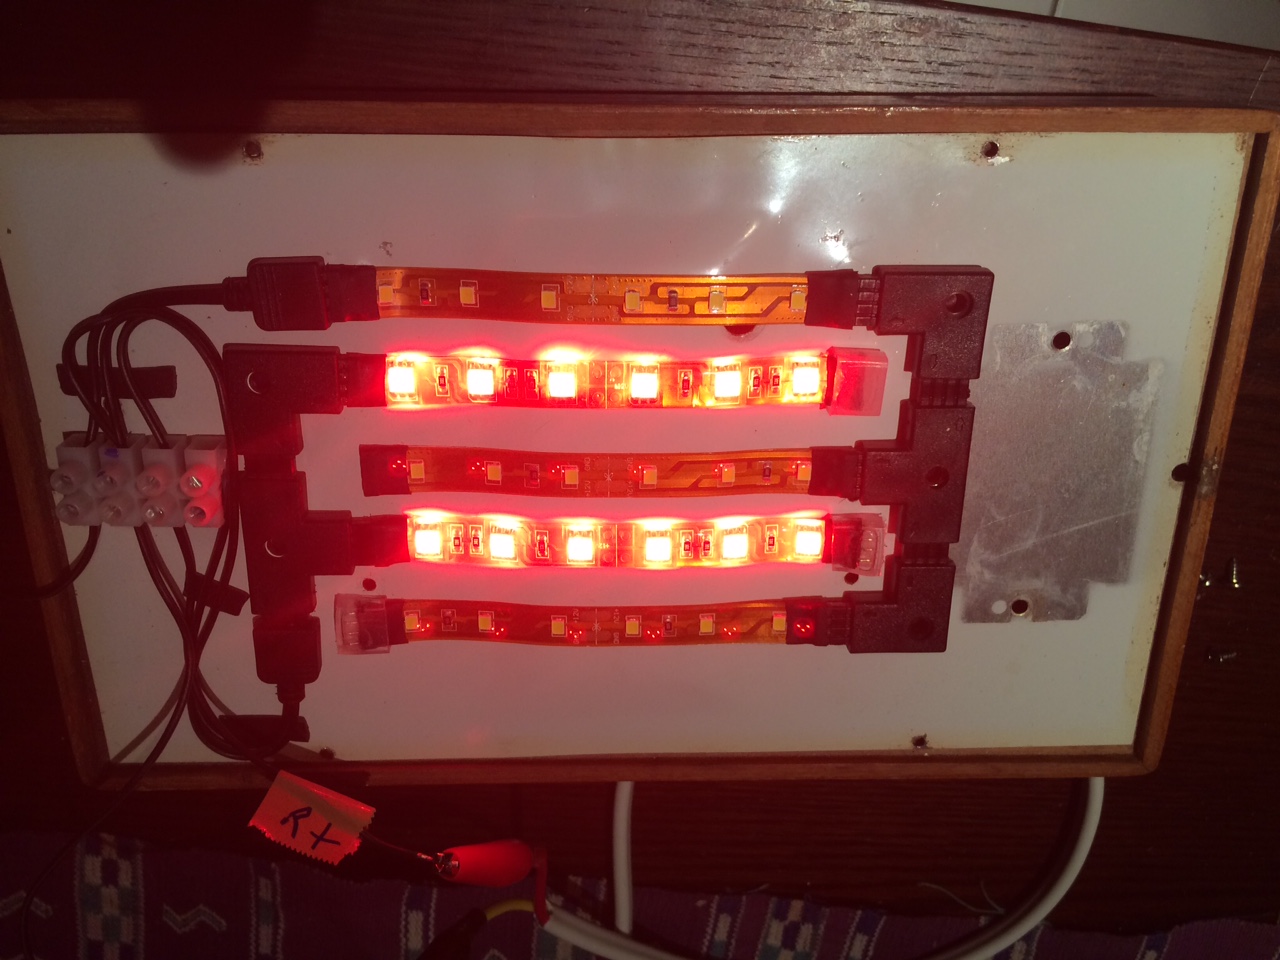

Red LED;

4" LED strips;


Costs;


Saturday, March 5, 2016

Sliding companionway hatch.....finally!

Aft sliding companionway hatch design finally completed and ready to be bolted down. The forward cross bar will obviously be removed. I know it's not to everyone's taste but it ties in with my no teak on deck concept. Existing forward hatch shown for comparison. That will also be replaced with a sliding Perspex hatch.